Data Types
This is the first of a few tutorials going over the basics of Blueprints in Unreal 4 and their applications in realtime VFX.
We aren't going to go over the basics of the UI and how to use the Blueprint editor, as there's a lot of great tutorials for this elsewhere., but more the specifics of how to use Blueprints for VFX.

Data Types - when we create a Variable we need to tell the engine what Data Type the Variable is for. Here we're just going to break down a few of the most useful ones and show some of their common uses. Note the colour coding - this hopefully should make it easier to work with the different Data Types.
Booleans
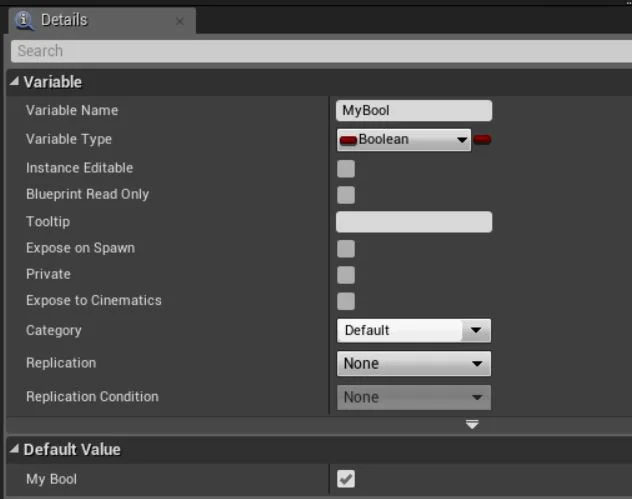
Here we have created a Boolean Variable and given it the name MyBool. Booleans are named after an English mathematician called George Boole (https://en.wikipedia.org/wiki/Boolean) and are used everywhere in computer science and engineering but basically they're just a simple True/False, On/Off, or 0,1.

If we just add a Print to our Variable and trigger it with BeginPlay in the Event Graph, we can see the Data Type printed out on screen when we start our game - true, or false, depending on the Default Value set in our Blueprint. Make sure a copy of your Blueprint is in the level for this Print command to work.

Here we're doing the exact same thing - Printing out True or False to screen but we're using the Bool with the Branch Node. This changes which execution pin is used based on the value of the Bool input - True:True, False:False.
Commonly Booleans are named in a way that makes it very clear which state is True and which is False, for example IsDestroyed?, CanBeBroken, etc.
Integers
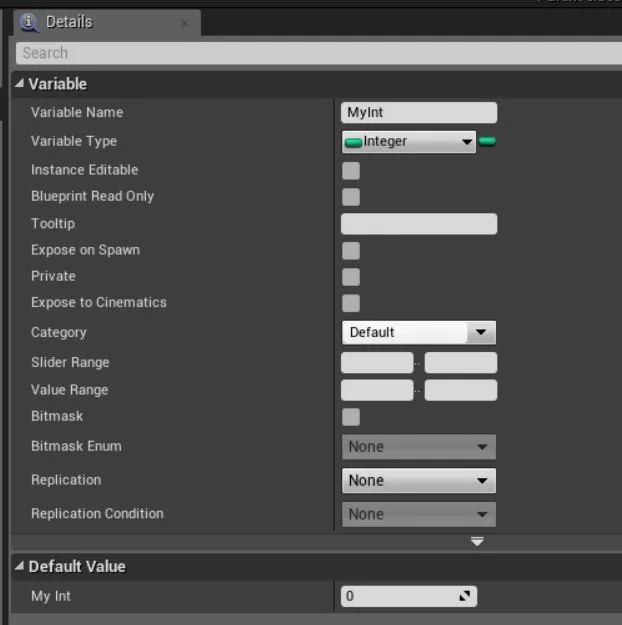
Integers are the name for the series of whole numbers, that don't have any fractional/decimal part. ie: 0, 2, 77, 1525 etc. this also includes negative numbers: -99, -5, -1, etc.

Again if we use the Print command and plug in our Int Variable it will print out the number to the console when we hit play (if we have a copy in level). Note the Convert Node that Unreal creates automatically - its converting the Int into a String so we can Print it. We'll get to what a String is later in the tutorial!
So one of the most common uses of an Int Variable is as a Counter - here we've set up a Delay for 1s and then used the Increment Int node to add 1 to MyInt. Then we check if MyInt is greater than 3, or MyInt > 3 to write it another way, and if it is we Print 'Finished!'. If not we loop back to the start of the Delay and repeat.

Another very common use of an Int is to Switch based on the Value of the Int. Here we've created 4 different options depending on what the value of MyInt is. We can create Switches based on other Data Types but Int is an easy to control and understand one.
Float

A Float is another Data Type that contains a number but here we can use full Floating Point precision - this means any decimal or fraction is allowed - 1.235, 15.1, -5.5 etc.

Floats are used for most number data in Unreal and here we've added a Point Light component to our Blueprint and are setting the Light Intensity based on the value of our MyFloat Variable.

So far everything we've done with Variables has been to Get the value of the Variable. Here we're doing a Set instead and writing the value of the Point Light Attenuation Radius to the MyFloat Variable. Note the return pin of the Set node and the Get node are exactly the same so either of the two Prints would do the same result.
VEctor

A Vector is a combination of three Floats that work together. This is generally used as a Coordinate (x,y,z), Direction (x,y,z), Scale (x,y,z) or Colour (R,G,B).

Here we're setting the Relative Location of a Cube to the value of the MyVec Variable. Using a Vector instead of 3 separate Floats makes it much easier to use and manipulate the data all at once.

Here we're setting the MyVec Variable to the Forward Vector of our Cube component. Being able to access this Location and Direction Data in our Blueprint to use it to affect our effects is incredible powerful.

If we do need to access the individual Floats in a Vector then we can use a Break node and do that. Once we're done with our editing, or if we want to just combine some Floats into a Vector, we can use a Make node to do that.
Colour

I mentioned before that colour was a Vector but if we create a Linear Colour Variable and try and Print it we get nothing (this is probably a bug and may be fixed in newer versions than 4.16.)
However if we break the colour we can see that it's actually made of an RGB Vector and an Alpha value - it's a Float4!
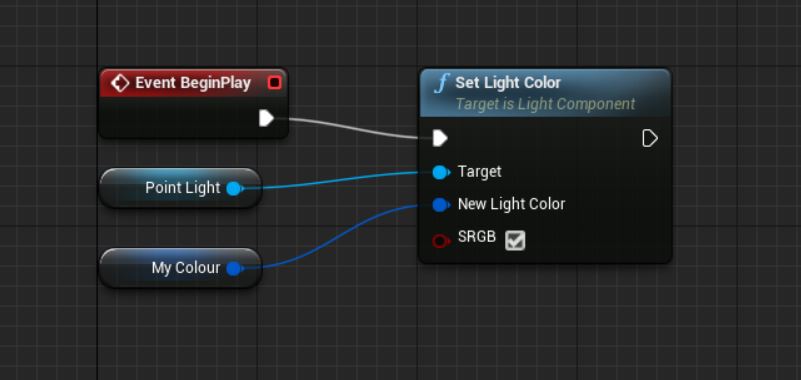
So obviously we use a Colour Variable when we want to control the Colour of something - a light, a material etc.
Transform
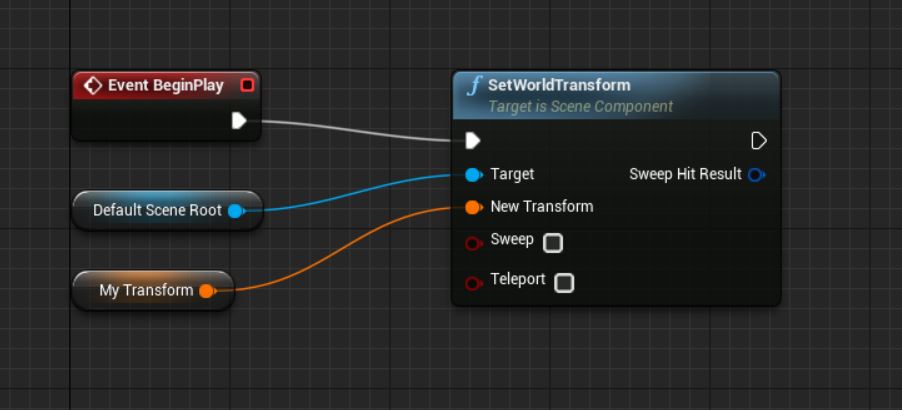
A Transform is a Data Type that combines 3 Vectors together to make them easy to work with.

Here we've broken the Transform into Location, Rotation and Scale Vectors and again into 9 Floats. Note the Rotation is a different colour - even though it's also a Vector Rotations are a bit awkward sometimes and are treated differently by the Engine.

Note when working with data that can be broken into smaller parts you can always just Right-Click on the Pin and choose Split Struct Pin. The Struct in that option is short for Structure - the general name for any Variable that contains more than one item of data - eg. Vector, Colour, Transform are all types of Struct. Unreal lets us create our own custom Structs and we'll get more into that later in this series.
String

A String is some written text. We've been converting everything into String so far to be able to Print it out on screen. The other two text Data Types are Name and Text. Name is a unique text identifier used by the engine to avoid clashes and Text is a special type of String that can be Localised into different languages for things like UI and Menus - neither of which get used as much in VFX.
Actor

Finally we're going to take an in depth look at an Actor Variable. Note that this isn't in the list of the common Variable types in the drop down list but is an incredibly powerful and useful tool.
Also note that we can't set a Default Value for an Actor Variable. Instead we're going to check the Instance Editable check box on the Variable details.

Checking that Boolean also opens the Eye icon on the Variables list (you can click this icon as alternative way of making this editable.) This is incredibly powerful as it allows us to change our Variables on each instance of a Blueprint in the level. (we'll get into this in a lot more detail in a later lesson when we start building a custom UI for our Blueprints.)


If we drop an instance of this Blueprint into the level and make sure something is referenced in the Variable, then when we hit play it will get the name of the Actor and print it - not that useful yet but we can also access anything else we want about our target Actor - including any Function we're written for it, but we'll get to that in a later tutorial.


If you've been using Unreal Engine for a while you'll probably have clicked on the default Sky actor and seen that it uses a reference to the Light Source - basically it takes the direction of the Directional Light and uses that to drive some of the Parameters of the Sky Material - we'll get to all that and more in due time!